Create List Item
sharepoint, Sharepoint, SharePoint
This activity creates a new list item on a SharePoint® site. See the tokens this activity produces.
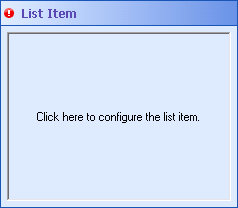
![]() How does this activity look in the Designer Pane?
How does this activity look in the Designer Pane?
- Drag it from the Toolbox Pane and drop it in the Designer Pane.
To configure this activity
Select the activity in the Designer Pane to configure the following property boxes in the Properties Pane.
See the following options:
-
 Activity Name
Once added to a workflow definition, the default name of an activity can be changed. Providing a custom name for an activity helps you remember the role it plays.
To name an activity
- Add an activity to your workflow by dragging it from the Toolbox Pane and dropping it in the Designer Pane.
- Select the activity in the Designer Pane.
- Under
 Activity Name in the Properties Pane,
replace the default name.
Note: Activity names cannot be the same as any other activity name in the workflow, they cannot be the same as the workflow's name, they must be less than 100 characters, they must contain at least one alphanumeric character, they cannot be "Name," and they cannot be the same as the activity's runtime type (which is usually only an issue with custom activities).
-
 Activity Description
Use the Activity Description to provide descriptive text to help you remember the role that the activity plays in the workflow. All activities contain a default description that you can modify while constructing your workflow.
To modify an activity description
- Add an activity to your workflow by dragging it from the Toolbox Pane and dropping it in the Designer Pane.
- Select the activity in the Designer Pane.
- Under
 Activity Description in the Properties Pane, replace the default description.
-
 Server
sharepoint, Sharepoint, SharePoint
The
 Server property box allows you to specify which SharePoint® site the Create List Item activity will connect to and create a list item on.
To connect to a SharePoint® site in the Web Service property box
- Add the Create List Item activity to your workflow definition by dragging it from the Toolbox Pane and dropping it in the Designer Pane.
- Select the activity in the Designer Pane.
- Under Server in the Properties Pane, select a SharePoint® server from the drop-down menu.
- Optional: To add, configure, or remove a SharePoint® server, select Manage Servers. More information.
- Optional: Click the refresh icon
 to update the list of SharePoint® servers available in the drop-down menu.
-
 List Item
sharepoint, Sharepoint, SharePoint, document library
The
 List Item property box, for the Create List Item activity, lets you add a list item to a SharePoint® site.
 To add a list item
- Add the Create List Item activity to your workflow definition by dragging it from the Toolbox Pane and dropping it in the Designer Pane.
- Select the activity in the Designer Pane.
- Under List Item in the Properties Pane, click anywhere in the property box.
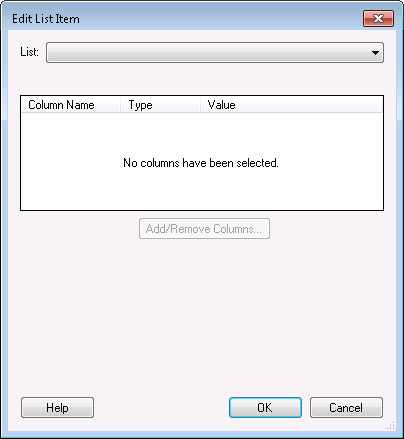
- In the
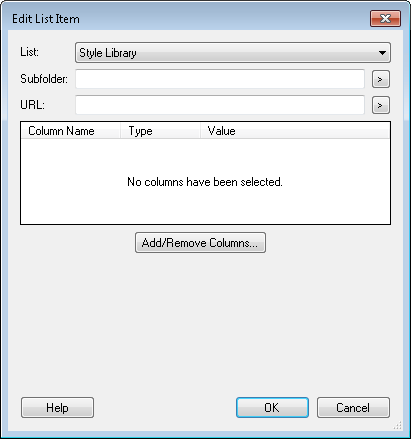
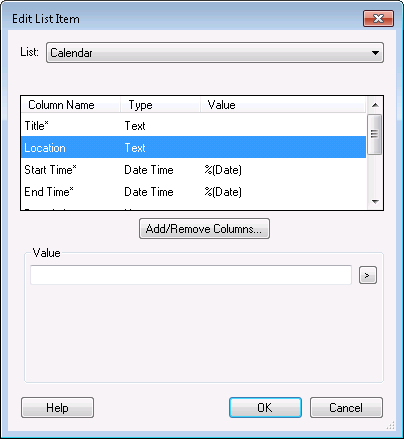
 Edit List Item dialog box, use the List drop-down menu to select the SharePoint® list you want to add an item to.
 - Optional: If the list you selected has subfolders, you can enter which folder you want to put your list item in next to Subfolders. Click the Token button (right arrow)
 to use tokens to specify a subfolder. If you do not specify a subfolder, the item will be added to the main list.
 - Optional: If the list you selected is a document library, type a URL (such as a Web Access URL) next to URL. Click the Token button (right arrow)
 to use tokens.
  Show me what this looks like. A text file with a URL extension will be created as the document for the list item being created. This allows a user to navigate to the URL you specified by clicking the document library link in SharePoint®.
 - Click the Add/Remove Columns button.
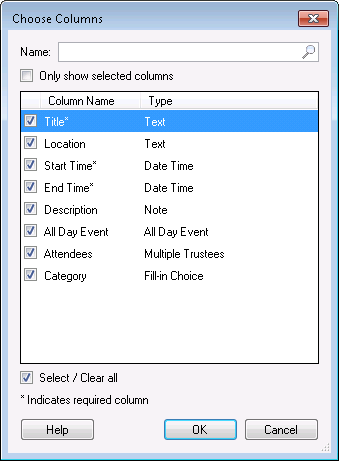
- In the
 Choose Columns dialog box, select which columns you want your list item to have data in. Clear the checkboxes next to the columns you do not want to add data to.
 - To find a specific column, start typing the column name next to Name. Click the red X
 to clear your search results.
 - To only see the columns you have selected, click Only show selected columns. To see all columns, clear this checkbox.
- To select or clear all the columns shown, select or clear the Select/Clear all checkbox.
- After selecting the desired columns, click OK.
- In the Edit List Item dialog box, select a column and enter a value for the column under Value. Click the Token button (right arrow)
 to use tokens.
 Show me what this looks like. Repeat for each column you want to configure.
 - After entering a value for each column, click OK.
Note: You can type a file path next to URL to upload a copy of a document instead of specifying a URL. This document must be on your Workflow Server or a network drive that your Workflow Server can access. Note that files referenced in this way are not exported as part of a Workflow Import File.
Note: An unselected column will be given its default value, if one has been specified, or it will be left blank.
Note: What you can enter under Value depends on the column type. For example, Date Time-type columns will only allow you to enter dates and/or times and Trustee-type columns will let you enter a user name.
Tip: Hyperlink columns let you insert a link. Use this column type (in combination with the Generate Web Access URLs activity) to link to documents in Web Access.
Important: Required columns have an asterisk (*) next to their name. If you leave a required column's value blank, a validation warning will appear for the Create List Item activity. You cannot publish workflows with activities that have validation warnings.


